Flask + MySQL结合案例
前言
在本文中,介绍如何将 Flask 框架与 MySQL 数据库进行结合,并以添加用户和查询所有用户的案例为引子,展示这一强大组合在实际应用中的无限魅力。通过本文的学习,将能够深入理解 Flask 框架与 MySQL 数据库的工作原理,掌握两者结合的关键技术,为今后的 Web 开发之路奠定坚实的基础。
正文
案例1:添加用户
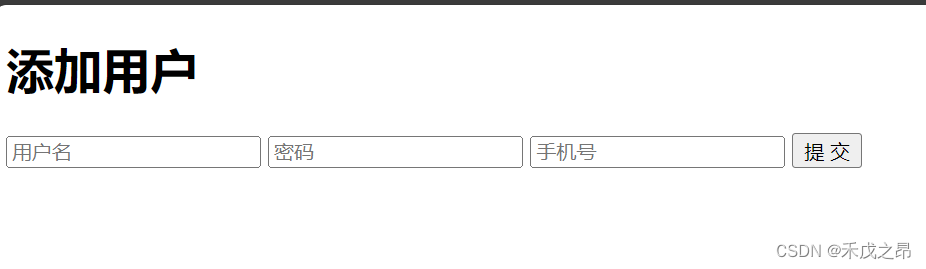
1.1 浏览器发送请求,返回页面
main.py
from flask import Flask, render_template

app = Flask(__name__)


@app.route("/add/user")
def add_user():
    return render_template("add_user.html")


if __name__ == '__main__':
    app.run()
html页面
<!DOCTYPE html>
<html lang="en">
<head>
    <meta charset="UTF-8">
    <title>Document</title>
</head>
<body>
    <h1>添加用户</h1>
    <form>
        <input type="text" name="user" placeholder="用户名">
        <input type="text" name="pwd" placeholder="密码">
        <input type="text" name="mobile" placeholder="手机号">
        <input type="submit" value="提 交">
    </form>
</body>
</html>
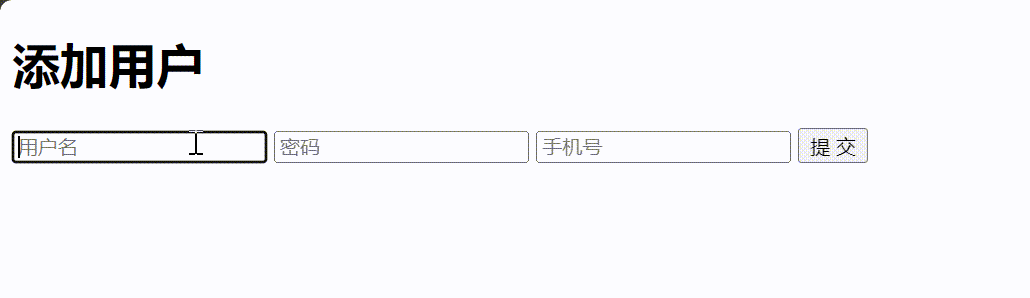
1.2 新增用户并连接数据库
main.py
import pymysql
from flask import Flask, render_template, request

app = Flask(__name__)


@app.route("/add/user", methods=["GET", "POST"])
def add_user():
    if request.method == "GET":
        return render_template("add_user.html")
    else:
        username = request.form.get('user')
        password = request.form.get('pwd')
        mobile = request.form.get('mobile')

        # 1.连接Mysql
        conn = pymysql.connect(host='127.0.0.1', port=3306, user='root', passwd='123456', charset='utf8', db='unicom')
        cursor = conn.cursor(cursor=pymysql.cursors.DictCursor)

        # 2.发送指令
        sql = "insert into admin(username, password, mobile) values(%s, %s, %s);"
        cursor.execute(sql, [username, password, mobile])
        conn.commit()

        # 3.关闭
        cursor.close()
        conn.close()

        return "添加成功"


if __name__ == '__main__':
    app.run()
html页面
<!DOCTYPE html>
<html lang="en">
<head>
    <meta charset="UTF-8">
    <title>Document</title>
</head>
<body>
    <h1>添加用户</h1>
    <form method="post" action="/add/user">
        <input type="text" name="user" placeholder="用户名">
        <input type="text" name="pwd" placeholder="密码">
        <input type="text" name="mobile" placeholder="手机号">
        <input type="submit" value="提 交">
    </form>
</body>
</html>
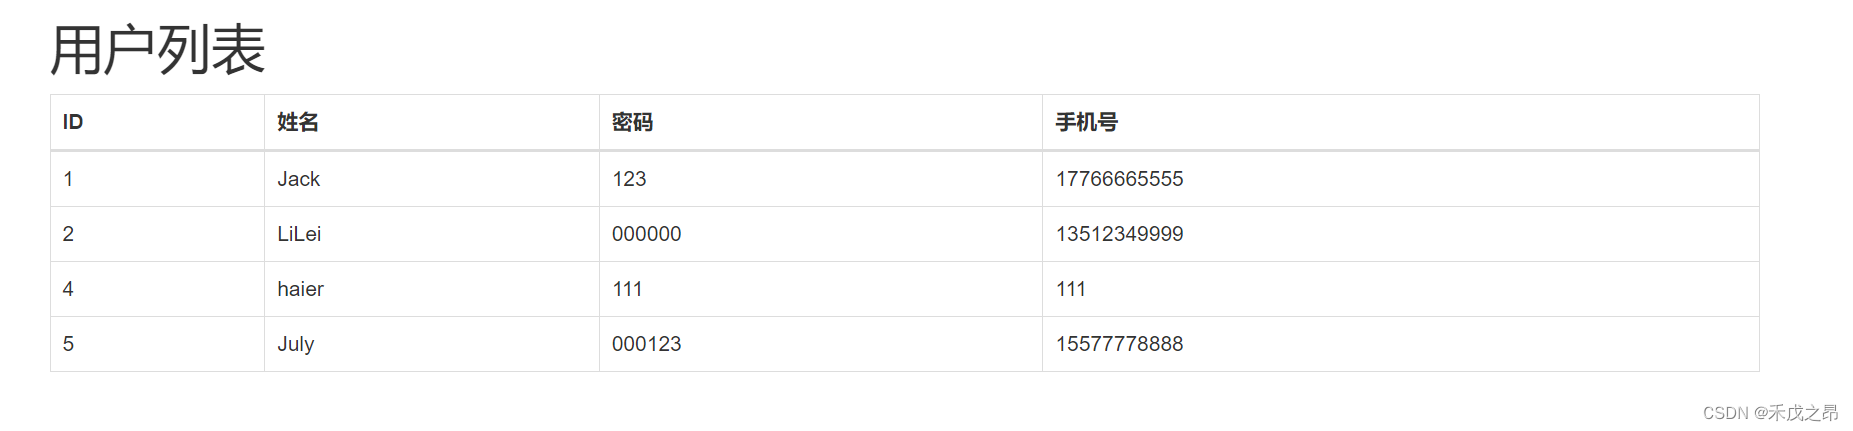
案例2:查询所有用户
2.1 main.py
@app.route("/show/user", methods=['GET', 'POST'])
def showUser():
# 1.连接Mysql
conn = pymysql.connect(host='127.0.0.1', port=3306, user='root',passwd='123456', charset='utf8', db='unicom')
cursor = conn.cursor(cursor=pymysql.cursors.DictCursor)
# 2.发送指令
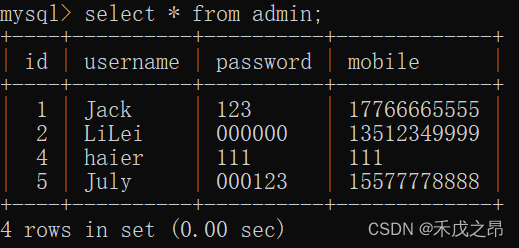
sql = "select * from admin"
cursor.execute(sql)
data_list = cursor.fetchall()
# 3.关闭
cursor.close()
conn.close()
return render_template("showUser.html", data_list=data_list)
2.2 html
<!DOCTYPE html>
<html lang="en">
<head>
<meta charset="UTF-8">
<title>Document</title>
</head>
<body>
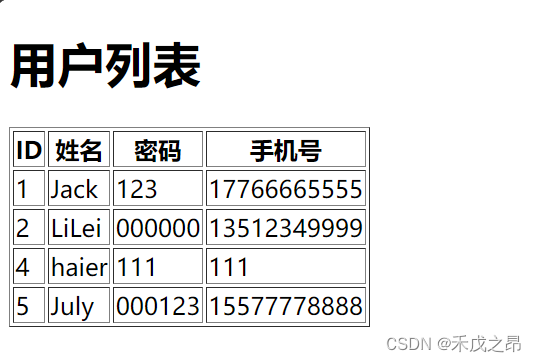
<h1>用户列表</h1>
<table border="1">
<thead>
<tr>
<th>ID</th>
<th>姓名</th>
<th>密码</th>
<th>手机号</th>
</tr>
</thead>
<tbody>
{% for item in data_list %}
<tr>
<td>{{ item.id }}</td>
<td>{{ item.username }}</td>
<td>{{ item.password }}</td>
<td>{{ item.mobile }}</td>
</tr>
{% endfor %}
</tbody>
</table>
</body>
</html>
2.3 bootstrap优化html
<!DOCTYPE html>
<html lang="en">
<head>
    <meta charset="UTF-8">
    <title>Document</title>

    <link rel="stylesheet" href="../static/plugins/bootstrap-3.4.1/css/bootstrap.css">

</head>
<body>
    <div class="container">
        <h1>用户列表</h1>
        <table class="table table-bordered">
            <thead>
                <tr>
                    <th>ID</th>
                    <th>姓名</th>
                    <th>密码</th>
                    <th>手机号</th>
                </tr>
            </thead>
            <tbody>
                {% for item in data_list %}
                <tr>
                    <td>{{ item.id }}</td>
                    <td>{{ item.username }}</td>
                    <td>{{ item.password }}</td>
                    <td>{{ item.mobile }}</td>
                </tr>
                {% endfor %}
            </tbody>
        </table>
    </div>

</body>
</html>